Unlocking the Magic: How to Make A Harry Potter Wand?

How to Make A Harry Potter Wand?

Welcome to this step-by-step guide on unlocking the magic by making your very own Harry Potter wand. Whether you’re a devoted Potterhead or simply looking for a fun DIY project, crafting a wand can transport you to the enchanting world of Hogwarts. In this article, we will guide you through the process in three parts, with each part containing two levels of content. Get ready to unleash your inner wizard and create a wand that will make you feel like you’re casting spells alongside Harry himself!

Part 1: Gathering Materials and Preparing the Wand

Level 1: Materials to Gather To embark on your wand-making journey, gather the following materials:

  1. A wooden dowel: Choose a dowel approximately 10-14 inches long, preferably made of birch or oak for durability.
  2. Sandpaper: Collect a variety of grits, including 120, 220, and 400, to smoothen the wand surface.
  3. Pencil or marker: Use this to mark the design on your wand.
  4. Basic tools: A coping saw or hacksaw, a wood file, and a clamp will be essential for shaping and refining your wand.

Level 2: Preparing the Wand

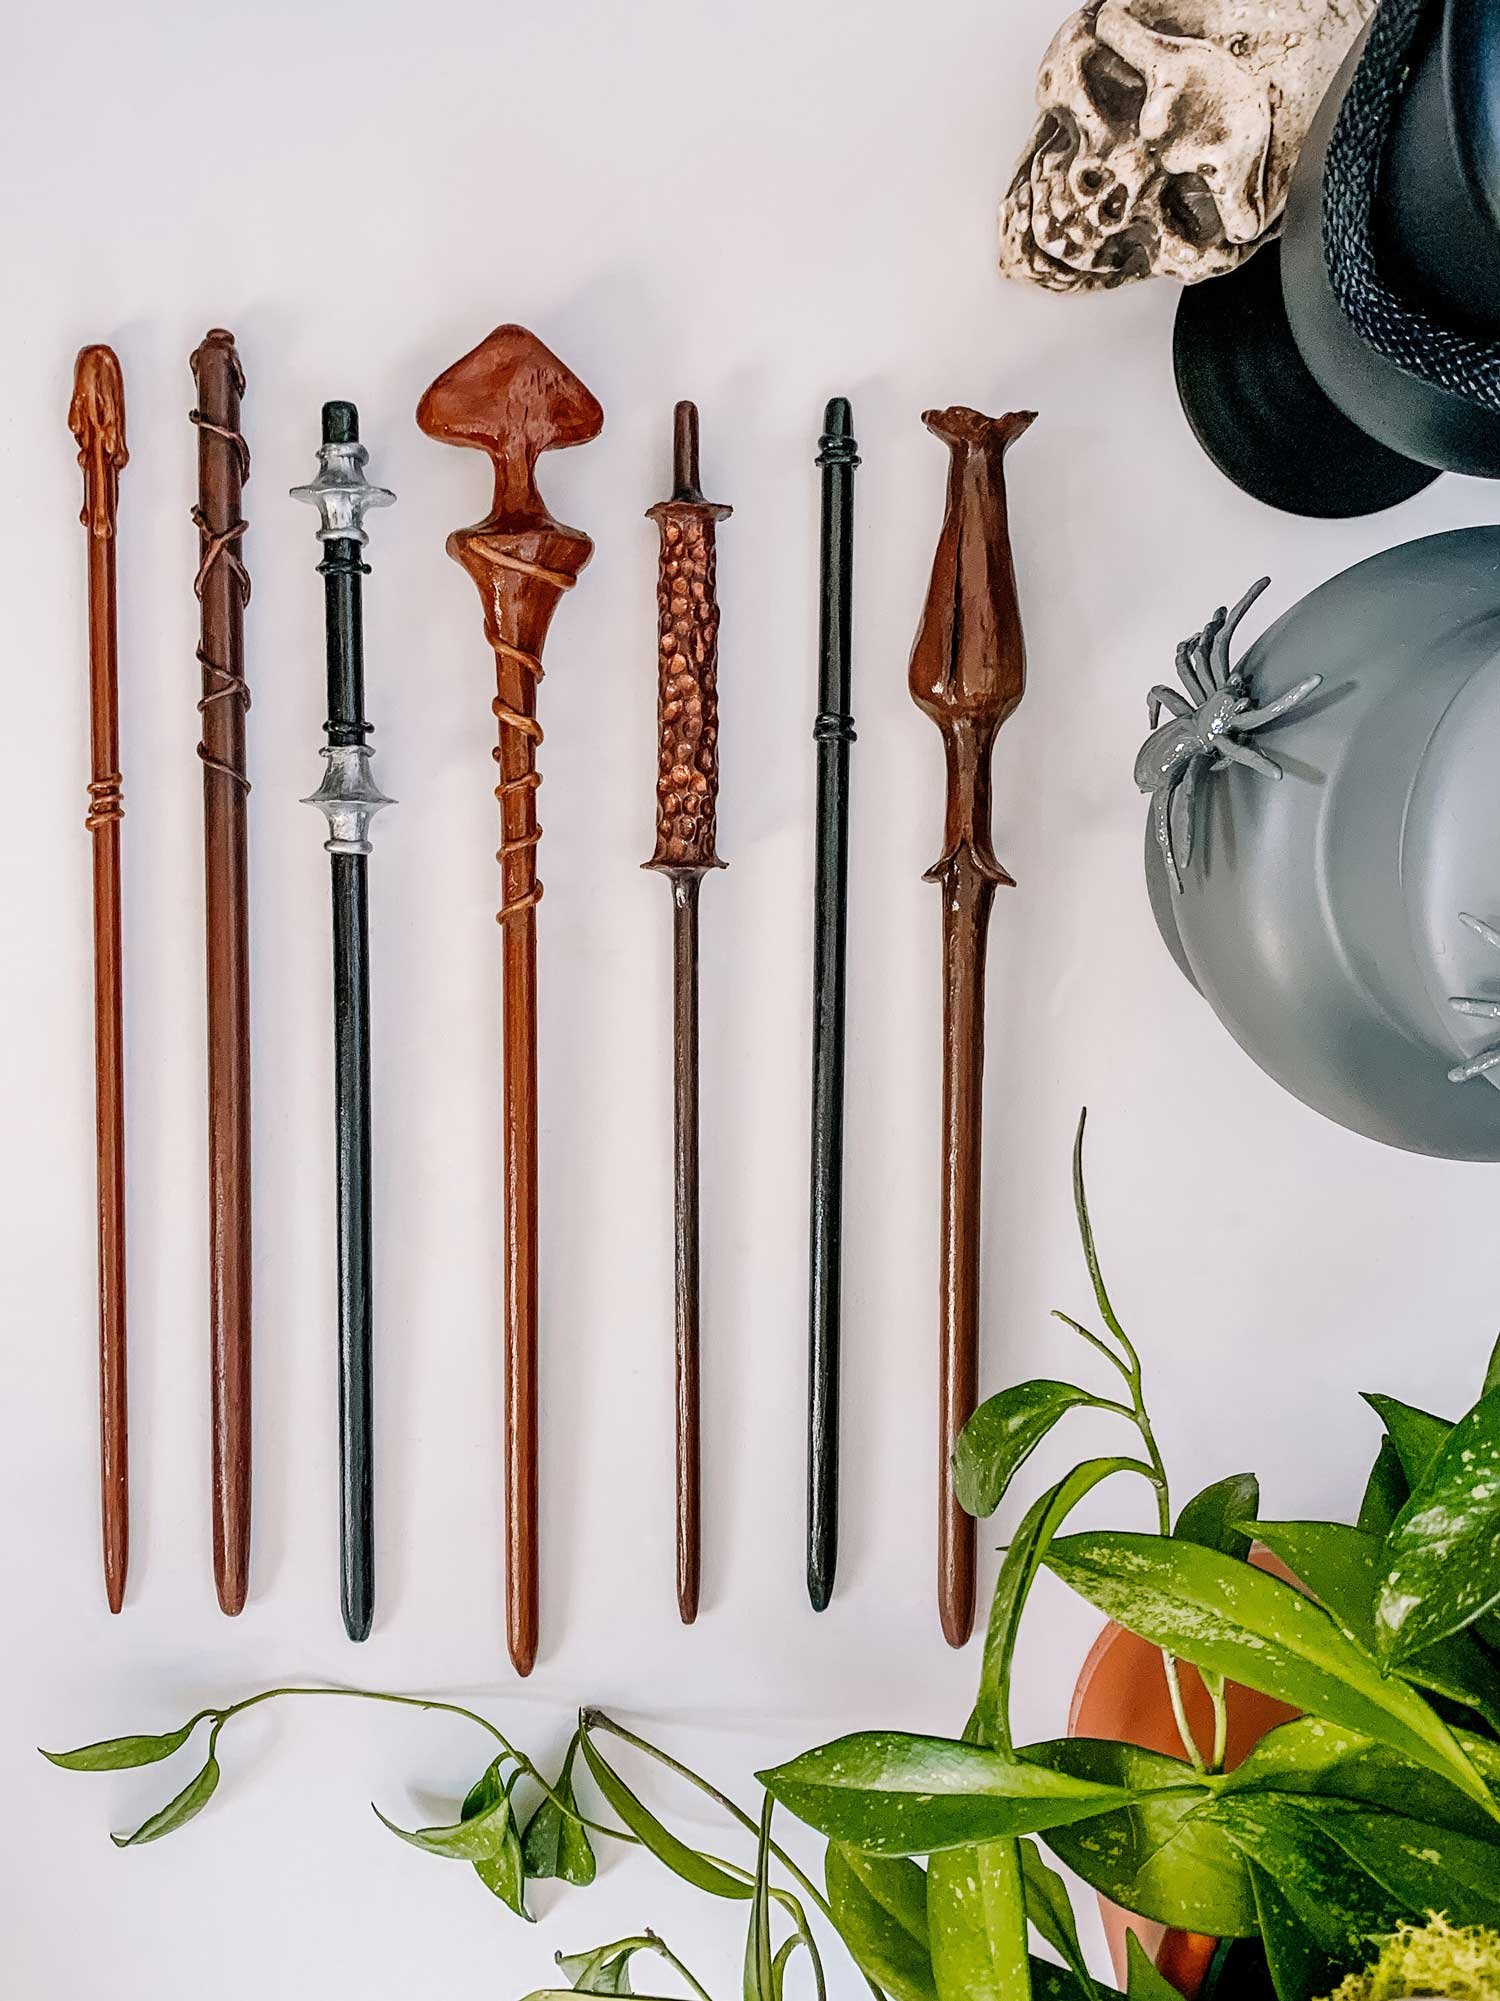
  1. Design your wand: Research various wand designs from the Harry Potter series or create your own unique one. Use a pencil or marker to sketch the design onto the wooden dowel.
  2. Sawing the dowel: Secure the dowel in a clamp and carefully cut along the marked lines using a coping saw or hacksaw. Take your time to ensure precision and smooth edges.
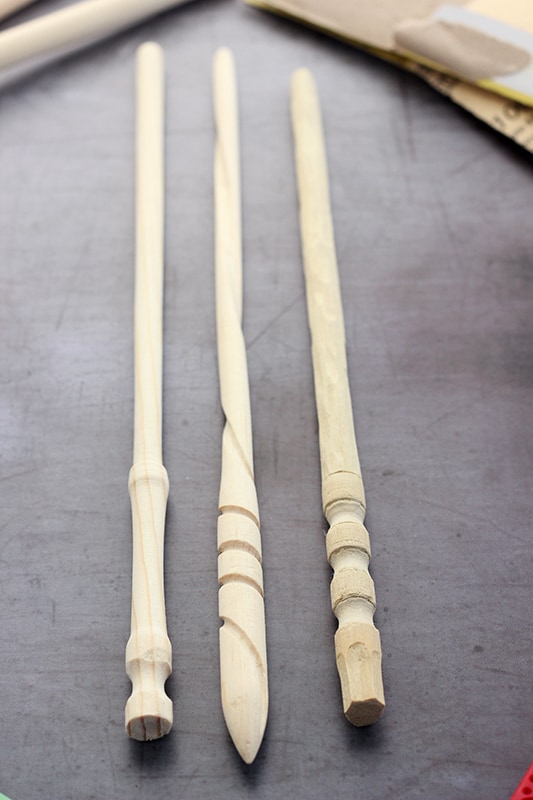
  3. Shaping the wand: Utilize a wood file to shape the rough cut edges and add intricate details to your design. Strike a balance between refining the wand’s shape while maintaining its desired thickness.
  4. Sanding the wand: Begin sanding the wand using lower grit sandpaper (e.g., 120) to remove any rough surfaces or imperfections. Gradually progress to finer grits (e.g., 220 and 400) for a polished finish. Ensure the wand feels smooth and comfortable in your hand.

Part 2: Adding Magical Elements

Level 1: Choosing Magical Elements

  1. Selecting the wand core: Decide on the type of wand core you wish to incorporate. Options include phoenix feather, unicorn hair, dragon heartstring, or even whimsical alternatives like basilisk scale or veela hair.
  2. Enhancing the wand handle: Consider the style of handle you desire, such as plain, carved, or adorned with gems, feathers, or other magical elements.

Level 2: Incorporating Magical Elements

  1. Creating the wand core: If using a natural material like a feather, hair, or scale, carefully insert it into a small hole drilled in the wand’s tip. Secure it in place with a dab of hot glue or epoxy.
  2. Decorating the wand handle: Carve intricate patterns, add gems, or use paints to enhance the wand’s handle. Let your imagination run wild, but remember that simplicity often enhances the wand’s elegance.

Part 3: Finishing Touches and Personalization

Level 1: Finishing Techniques

  1. Staining or painting: Consider staining the wood with a suitable wood stain to enhance its natural beauty. Alternatively, use acrylic paints to add vibrant colors and a touch of enchantment.
  2. Applying a clear coat or varnish: Protect your wand and give it a glossy finish by applying a clear coat or varnish. Follow the manufacturer’s instructions for the best results.

Level 2: Personalization

  1. Wand length and thickness: Personalize the wand’s length and thickness based on your preferences. Experiment and find a size that feels comfortable and reflects your magical persona.
  2. Custom details: Add personal touches by carving your initials, favorite symbols, or small engravings that hold special meaning to you.

Conclusion:

How to Make A Harry Potter Wand? Congratulations! You have unlocked the magic by creating your own Harry Potter wand. In this guide, we covered gathering the necessary materials, preparing the wand, incorporating magical elements, and adding finishing touches. Remember, wand-making is an art that allows you to express your creativity and immerse yourself in the world of wizardry. Now, take your wand, cast your spells, and let the magic unfold!

A Beginner’s Guide: How to Make A Harry Potter Wand?

How to Make A Harry Potter Wand?

The magical world of Harry Potter has captured the hearts and imaginations of millions of fans worldwide. One iconic element of this beloved franchise is the wand, a tool that channels and enhances a wizard’s magic. In this beginner’s guide, we will explore the art of wand making, breaking it down into three parts. Each part will contain two levels of content, providing a comprehensive step-by-step approach to crafting your very own Harry Potter wand.

Part 1: Understanding the Essence of a Wand

Level 1: Exploring the Significance of a Wand To embark on this wand-making journey, it is essential to understand the significance of a wand in the wizarding world. Wands are more than mere accessories; they are an extension of a wizard’s personality, strength, and magical abilities. Research the lore behind wands and familiarize yourself with the different wand woods and cores used in the Harry Potter series. Delve into the magical properties associated with various woods and cores, as this knowledge will guide your wand-making decisions.

Level 2: Gathering Materials Now that you comprehend the importance of a wand, it’s time to gather the necessary materials. Start by obtaining a sturdy wooden dowel or stick, approximately 10-14 inches in length, as the foundation for your wand. Seek out a selection of wand woods, such as oak, willow, or elder, based on their respective magical properties. Additionally, acquire a magical core material, such as phoenix feather, dragon heartstring, or unicorn hair, to insert into your wand. Gather other essential materials such as sandpaper, paint, varnish, and decorative elements like gemstones or beads for customization.

Part 2: Crafting Your Wand

Level 1: Preparing the Wand Base Begin by inspecting your chosen wooden dowel. Sand down any rough edges or imperfections, ensuring a smooth surface for the handle and shaft of your wand. Next, consider the desired shape and design of your wand. Sketch out your ideas, keeping in mind the characteristics of the chosen wood and the essence you wish to capture. Once you have a clear plan in mind, use a sharp knife or woodcarving tools to carefully shape the wand’s handle, tapering it towards the tip for a traditional wand silhouette.

Level 2: Adding Magical Elements With the wand base complete, it’s time to infuse your creation with magical properties. Using a drill or a small chisel, create a hollow area at the tip of the wand to accommodate the magical core. Insert your chosen core material securely, ensuring it fits perfectly within the wand’s structure. Next, consider the wand’s aesthetics. Apply a base coat of paint to the entire wand, allowing it to dry completely. Once dry, layer on additional colors or patterns to reflect your wand’s unique personality. Finally, add any desired decorative elements such as gemstones or beads, affixing them securely to the handle using craft glue.

Part 3: Personalizing and Showcasing Your Wand

Level 1: Customizing Your Wand Now that your wand is taking shape, it’s time to add personalized touches. Consider engraving or burning intricate designs into the wood, reflecting your own style and creativity. Experiment with different finishing techniques, such as distressing or aging, to give your wand a weathered and authentic appearance. Remember, the wand should be an extension of yourself, so don’t be afraid to let your imagination run wild during this customization phase.

Level 2: Displaying and Connecting with Your Wand Once your wand is complete, it deserves a special place to be showcased. Create a unique display stand or case using simple materials such as wood, fabric, or even repurposed household items. Design a display that reflects the magical world of Harry Potter, allowing your wand to stand as a testament to your creativity and dedication. Remember to connect with your wand, embracing its magic and channeling your own intentions and aspirations while using it.

Conclusion:

How to Make A Harry Potter Wand? Crafting your own Harry Potter wand is a magical endeavor that allows you to bring a piece of the wizarding world into your own hands. By understanding the essence of a wand, gathering materials, and following a step-by-step process, you can create a wand that is not only aesthetically pleasing but also deeply personal. As you display and connect with your wand, may it serve as a reminder of the power of imagination and the endless possibilities that lie within the realm of magic.

Tips and Tricks: How to Make A Harry Potter Wand?

How to Make A Harry Potter Wand?

Harry Potter has captivated the hearts and imaginations of millions around the world. From the enchanting world of wizards and witches to the magical artifacts, one item that stands out is the iconic wand. Whether you’re a dedicated Potterhead or simply looking for a fun craft project, making your own Harry Potter wand can be a delightful and rewarding experience. In this article, we’ll guide you through three parts, each offering two levels of content, to help you create a wand that would make Ollivander proud.

Part 1: Getting Started

Level 1: Gathering Materials To embark on your wand-making journey, you’ll need a few basic supplies. Here’s a list of materials to get you started:

  1. A wooden dowel: Choose a dowel around 12-14 inches in length, preferably made of birch or oak for durability and authenticity.
  2. Sandpaper: Various grits of sandpaper, such as 120, 220, and 400, will help shape and smooth the wand.
  3. Craft knife or chisel: Essential for carving intricate details on the wand.
  4. Wood stain or paint: Select a color that reflects your wand’s character and aesthetic.
  5. Clear varnish: To protect and enhance the appearance of your finished wand.
  6. Optional: Decorative elements like beads, gemstones, or feathers for personalization.

Level 2: Preparing the Wand

  1. Sanding: Begin by using the coarsest grit of sandpaper (120) to remove any rough edges or imperfections from the dowel. Gradually progress to finer grits (220 and 400) to achieve a smooth finish.
  2. Shaping: Use the craft knife or chisel to create unique patterns, grooves, or designs on the wand. Look for inspiration from the distinctive wands in the Harry Potter series.
  3. Handle and Tip: Pay attention to the wand’s handle and tip. Carve details that highlight the wand’s character, such as spirals, feathers, or animal-like features.
  4. Sanding (Again): After carving, sand the entire wand once more to ensure all surfaces are smooth and any rough edges are eliminated.
  5. Optional: If desired, add decorative elements to the wand’s handle or tip to add a personal touch.

Part 2: Adding Magic

Level 1: Painting and Staining

  1. Base Coat: Apply a base coat of paint or stain to the entire wand, covering the surface evenly. This will provide a foundation for further detailing.
  2. Details: Once the base coat is dry, use a smaller brush to add intricate details, such as unique patterns or colors, to further personalize your wand. Refer to your favorite characters’ wands for inspiration.
  3. Weathering Effect: To give your wand an ancient or weathered look, lightly sand some areas with fine-grit sandpaper. Aim for specific places like the handle, where natural wear and tear occur.
  4. Tip Highlight: For an added touch, use a metallic paint or gold leafing to emphasize the wand’s tip and make it stand out.

Level 2: Varnishing and Finishing

  1. Protective Coat: Once the paint and detailing are dry, apply a clear varnish to protect the wand and give it a glossy finish. This will also enhance the colors and details.
  2. Multiple Coats: Apply two to three thin coats of varnish, allowing each layer to dry completely before proceeding. Lightly sand between coats for an ultra-smooth finish.
  3. Polishing: Once the final coat is dry, use a soft cloth to gently polish the wand, removing any dust or imperfections that may have settled on the surface.
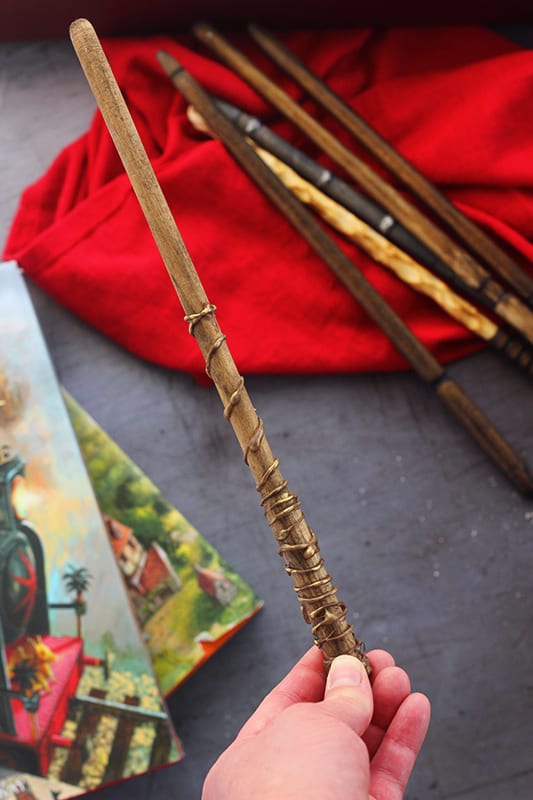
  4. Optional: If desired, wrap the handle with leather, fabric, or twine to provide a comfortable grip and add an extra layer of authenticity.

Part 3: Unleashing the Magic

Level 1: Bonding with Your Wand

  1. Personal Connection: Spend time getting to know your wand. Hold it, feel its weight in your hand, and let your creativity flow. The bond between a wizard and their wand is a unique and personal experience.
  2. Practice and Experiment: Use your wand to cast spells, perform tricks, or simply let your imagination soar. Practice different movements and incantations to find your own magical style.

Level 2: Sharing the Magic

  1. Show and Tell: Share your wand creation with fellow Harry Potter enthusiasts, friends, or family. Display it proudly on a shelf or use it during costume parties or themed events.
  2. Inspire Others: Document and share your wand-making journey on social media or start a blog. Encourage others to embark on their own wand-making adventure or explore other Harry Potter crafts.

Conclusion:

How to Make A Harry Potter Wand? Creating your very own Harry Potter wand is a magical experience that allows you to immerse yourself in the enchanting world of wizardry. By following the steps outlined in this article, you’ll be able to craft a wand that reflects your own unique style and imagination. From the selection of materials to adding the finishing touches, the process of making a wand is an art in itself. So, grab your tools, let your creativity flow, and get ready to unleash the magic that lies within your newly crafted Harry Potter wand.

Magical DIY: How to Make A Harry Potter Wand?

 How to Make A Harry Potter Wand?

Are you a die-hard Harry Potter fan looking to add a touch of magic to your life? Look no further! In this blog post, we will guide you through the enchanting process of creating an authentic Harry Potter wand. Get ready to unleash your inner wizard and embark on a DIY adventure that will transport you to the whimsical world of Hogwarts. This article consists of three parts, each containing two levels of content, to help you create a wand that would make Ollivander himself proud.

Part 1: The Foundation of Wand Making

Level 1: Understanding the Essence of a Wand

To create an authentic wand, it is crucial to understand the essence of these magical objects. In the Harry Potter series, wands are conduits of magical energy, reflecting the personality and core elements of their owners. Each wand possesses a unique combination of wood and core material, making it a personalized tool for its wielder.

Level 2: Choosing the Perfect Wood and Core Material

  1. Selecting the Wood:
  • Research the symbolism behind different woods used in wand making. For example, oak represents strength and stability, while cherry signifies passion and intensity.
  • Consider the character traits of the wand’s intended owner. Choose a wood that aligns with their personality, as it will enhance their magical abilities.
  1. Deciding the Core Material:
  • Explore the various core materials mentioned in the Harry Potter series. Phoenix feathers, dragon heartstrings, and unicorn hairs are the most common.
  • Study the characteristics associated with each core material. Phoenix feathers denote great loyalty, dragon heartstrings possess immense power, and unicorn hairs indicate a pure and noble connection to magic.

Part 2: Crafting a Wand with Magical Aesthetics

Level 1: Shaping Your Wand

Now that you have chosen the foundation of your wand, it’s time to shape it to perfection.

Level 2: Adding Unique Design Elements

  1. Carving Intricate Patterns:
  • Sketch out your desired design on the wand using a pencil.
  • Utilize a wood carving tool to carefully etch the patterns onto the wand’s surface.
  • Incorporate symbols, patterns, or engravings that hold personal significance for the wand’s owner.
  1. Enhancing Aesthetic Appeal:
  • Experiment with staining or painting techniques to add color and depth to the wand.
  • Apply coats of varnish to protect the wood and give it a polished finish.
  • Consider adding gemstones, feathers, or other embellishments to make the wand truly one-of-a-kind.

Part 3: Infusing Magic into Your Wand

Level 1: Channeling Magical Energy

To create an authentic Harry Potter wand, you must infuse it with magical energy.

Level 2: Magical Activation Rituals

  1. Wand Blessing Ceremony:
  • Research traditional wand blessing rituals or create your own.
  • Gather friends and family to witness and participate in the ceremony.
  • Envision the wand imbued with the desired qualities and intentions, infusing it with personal energy.
  1. Personal Connection and Practice:
  • Encourage the wand’s owner to establish a personal connection with their wand through meditation or visualization.
  • Practice spells, charms, and incantations with the wand to tune its magical energy to its owner.

Conclusion:

How to Make A Harry Potter Wand? Congratulations! You have successfully created an authentic Harry Potter wand that captures the essence of the wizarding world. By understanding the significance of wood and core materials, shaping the wand to perfection, and infusing it with magical energy, you have crafted a masterpiece that would make any witch or wizard envious. Embrace the enchantment and let your wand guide you on an extraordinary journey through the realms of magic and imagination. Remember, the true magic lies within you!

Unleash Your Inner Wizard: How to Make A Harry Potter Wand?

How to Make A Harry Potter Wand?

Part 1: The Magic of Harry Potter Wands

Level 1: Introduction to Harry Potter Wands

Harry Potter, the beloved wizarding world created by J.K. Rowling, has captivated millions of fans worldwide. One of the most iconic symbols of this enchanting universe is the wand, a magical tool that grants wizards their powers and helps them channel their magic. If you’re a fan looking to unleash your inner wizard, what better way than to create your very own Harry Potter wand? In this DIY tutorial, we’ll guide you through the process step by step, helping you bring a touch of magic into your own hands.

Level 2: The Significance of Wands in the Wizarding World

Wands are more than just a prop in the Harry Potter series; they hold great importance in the wizarding world. Each wand is unique, with a core made from materials like phoenix feathers, dragon heartstrings, or unicorn hairs. The wand chooses the wizard, reflecting their personality and abilities. This bond between wand and wizard is crucial as it enhances the wizard’s magical abilities and helps them perform spells with precision. Creating your own wand allows you to explore your own magical connection and express your individuality in a way that mirrors the characters from the books and movies.

Part 2: Gathering Materials and Tools

Level 1: Essential Materials for Wand Making

To embark on this DIY journey, you’ll need a few materials readily available at any craft store. Firstly, select a wooden dowel or branch as the wand’s base. Oak, birch, or willow are excellent choices. Additionally, you’ll need sandpaper to smooth the surface, a pencil for marking, and a craft knife for carving intricate designs. Finally, gather paints, varnishes, and brushes to add that perfect magical touch to your creation.

Level 2: Personalizing Your Wand Design

While the Harry Potter series provides some inspiration for wand designs, it’s essential to add your personal touch. Think about your favorite magical creatures, symbols, or even your own name to incorporate into the wand’s design. Experiment with different shapes, patterns, and carvings to create a wand that reflects your own magical style. Remember, your wand should speak to you and represent your unique character as a wizard.

Part 3: Crafting and Finishing Your Wand

Level 1: Carving and Shaping Your Wand

Before you begin carving, mark the shape and length of your wand using a pencil. Use the craft knife to carefully carve away the excess wood, working from the base towards the tip. Smooth out any rough edges with sandpaper, ensuring a comfortable grip for spellcasting. Don’t be afraid to experiment with different textures, grips, and ridges to add character to your wand.

Level 2: The Art of Wand Decoration

Once your wand is carved to perfection, it’s time to bring it to life with colors and decorations. Start by applying a base coat of paint using colors that resonate with your magical personality. Then, consider adding intricate designs using finer brushes or even using metallic paints to create a captivating shimmer. Finally, apply a protective varnish to seal the wand and give it a polished look.

Conclusion:

How to Make A Harry Potter Wand? Crafting your own Harry Potter wand is an exciting way to immerse yourself in the magical world of Harry Potter. By following this DIY tutorial, you can unleash your inner wizard and create a wand that reflects your own magical persona. From gathering materials to carving and decorating, each step allows for personalization and self-expression, making this DIY project a unique and enchanting experience. So, grab your wand-making supplies and let your creativity flow as you embark on this magical journey. Expelliarmus, and happy wand making!

Step-by-Step Guide: How to Make A Harry Potter Wand?

How to Make A Harry Potter Wand?

Introduction:

Welcome to this comprehensive step-by-step guide on crafting your very own Harry Potter wand at home. Whether you’re a die-hard Harry Potter fan or simply looking for a creative DIY project, making your own wand can be a fun and rewarding experience. In this article, we will walk you through the process in three parts, each containing two levels of content, ensuring you have all the information you need to create a wand that would make even Ollivander proud.

Part 1: Gathering Materials and Preparing the Wand

Level 1: Materials to Gather

To begin crafting your own Harry Potter wand, you’ll need to gather the following materials:

  1. A wooden dowel: around 10-14 inches long, preferably made of birch or oak.
  2. Sandpaper: various grits such as 120, 220, and 400 for a smooth finish.
  3. A pencil or marker: for marking the design on the wand.
  4. Basic tools: a coping saw or hacksaw, a wood file, and a clamp.

Level 2: Preparing the Wand

  1. Choose your wand’s design: Research different wand designs from the Harry Potter series or create your own unique design. Sketch the design onto the wooden dowel using a pencil or marker.
  2. Sawing the dowel: Secure the dowel in a clamp and use a coping saw or hacksaw to cut along the marked lines. Take your time and ensure smooth, precise cuts.
  3. Shaping the wand: Use a wood file to shape the rough cut edges and add details to your design. Take care not to remove too much wood and maintain the wand’s desired thickness and shape.
  4. Sanding the wand: Begin sanding the wand using a lower grit sandpaper (e.g., 120) to remove any rough surfaces or imperfections. Gradually work your way up to finer grits (e.g., 220 and 400) for a polished finish. Ensure the wand feels smooth and comfortable in your hand.

Part 2: Adding Magical Elements

Level 1: Choosing Magical Elements

  1. Wand Core: Decide on the type of wand core you’d like to incorporate. Options include phoenix feather, unicorn hair, dragon heartstring, or even whimsical alternatives like basilisk scale or veela hair.
  2. Wand Handle: Consider the handle style you desire. Options include plain, carved, or adorned with gems, feathers, or other magical elements.

Level 2: Incorporating Magical Elements

  1. Creating the wand core: If using a natural material such as feather, hair, or scale, carefully insert it into a small hole drilled in the wand’s tip. Secure it in place with a dab of hot glue or epoxy.
  2. Decorating the wand handle: Carve intricate patterns, add gems, or use paints to enhance the wand’s handle. Let your imagination guide you, but remember that simplicity often enhances the wand’s elegance.

Part 3: Finishing Touches and Personalization

Level 1: Finishing Techniques

  1. Staining or painting: Consider staining the wood with a wood stain of your choice to enhance its natural beauty. Alternatively, you can paint the wand using acrylic paints for a more vibrant look.
  2. Clear coat or varnish: Apply a clear coat or varnish to protect the wand and give it a glossy finish. Follow the manufacturer’s instructions for best results.

Level 2: Personalization

  1. Wand length and thickness: Personalize the wand’s length and thickness based on your preferences. Experiment and find a size that feels comfortable and suits your style.
  2. Custom details: Add personal touches by carving your initials, favorite symbols, or small engravings that hold special meaning to you.

Conclusion:

How to Make A Harry Potter Wand? Crafting your own Harry Potter wand at home can be an enchanting experience that brings out your creativity. By following this step-by-step guide, you’ve learned how to gather materials, prepare the wand, add magical elements, and apply finishing touches. Remember, the true magic lies within the personalization and effort you put into creating your wand. So, grab your tools, let your imagination soar, and may your wand-making journey be filled with wizarding wonder!