Introduction:
Welcome to this comprehensive step-by-step guide on crafting your very own Harry Potter wand at home. Whether you’re a die-hard Harry Potter fan or simply looking for a creative DIY project, making your own wand can be a fun and rewarding experience. In this article, we will walk you through the process in three parts, each containing two levels of content, ensuring you have all the information you need to create a wand that would make even Ollivander proud.
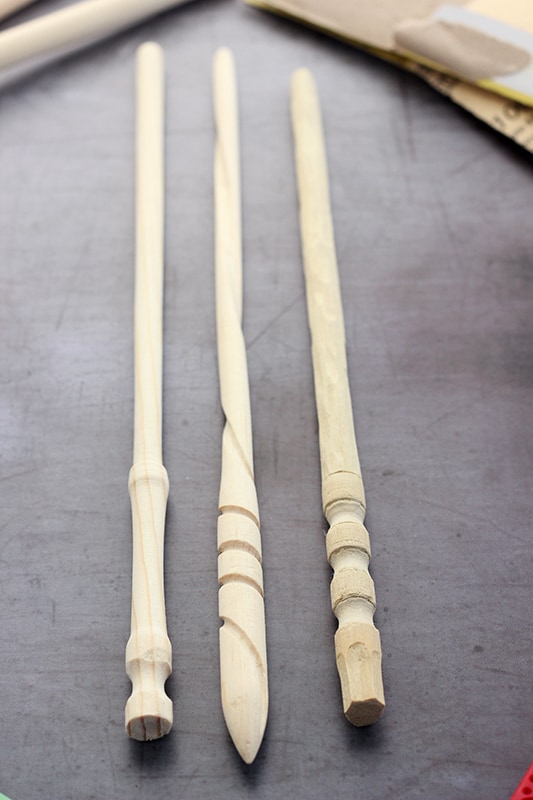
Part 1: Gathering Materials and Preparing the Wand
Level 1: Materials to Gather
To begin crafting your own Harry Potter wand, you’ll need to gather the following materials:
- A wooden dowel: around 10-14 inches long, preferably made of birch or oak.
- Sandpaper: various grits such as 120, 220, and 400 for a smooth finish.
- A pencil or marker: for marking the design on the wand.
- Basic tools: a coping saw or hacksaw, a wood file, and a clamp.
Level 2: Preparing the Wand
- Choose your wand’s design: Research different wand designs from the Harry Potter series or create your own unique design. Sketch the design onto the wooden dowel using a pencil or marker.
- Sawing the dowel: Secure the dowel in a clamp and use a coping saw or hacksaw to cut along the marked lines. Take your time and ensure smooth, precise cuts.
- Shaping the wand: Use a wood file to shape the rough cut edges and add details to your design. Take care not to remove too much wood and maintain the wand’s desired thickness and shape.
- Sanding the wand: Begin sanding the wand using a lower grit sandpaper (e.g., 120) to remove any rough surfaces or imperfections. Gradually work your way up to finer grits (e.g., 220 and 400) for a polished finish. Ensure the wand feels smooth and comfortable in your hand.
Part 2: Adding Magical Elements
Level 1: Choosing Magical Elements
- Wand Core: Decide on the type of wand core you’d like to incorporate. Options include phoenix feather, unicorn hair, dragon heartstring, or even whimsical alternatives like basilisk scale or veela hair.
- Wand Handle: Consider the handle style you desire. Options include plain, carved, or adorned with gems, feathers, or other magical elements.
Level 2: Incorporating Magical Elements
- Creating the wand core: If using a natural material such as feather, hair, or scale, carefully insert it into a small hole drilled in the wand’s tip. Secure it in place with a dab of hot glue or epoxy.
- Decorating the wand handle: Carve intricate patterns, add gems, or use paints to enhance the wand’s handle. Let your imagination guide you, but remember that simplicity often enhances the wand’s elegance.
Part 3: Finishing Touches and Personalization
Level 1: Finishing Techniques
- Staining or painting: Consider staining the wood with a wood stain of your choice to enhance its natural beauty. Alternatively, you can paint the wand using acrylic paints for a more vibrant look.
- Clear coat or varnish: Apply a clear coat or varnish to protect the wand and give it a glossy finish. Follow the manufacturer’s instructions for best results.
Level 2: Personalization
- Wand length and thickness: Personalize the wand’s length and thickness based on your preferences. Experiment and find a size that feels comfortable and suits your style.
- Custom details: Add personal touches by carving your initials, favorite symbols, or small engravings that hold special meaning to you.
Conclusion:
How to Make A Harry Potter Wand? Crafting your own Harry Potter wand at home can be an enchanting experience that brings out your creativity. By following this step-by-step guide, you’ve learned how to gather materials, prepare the wand, add magical elements, and apply finishing touches. Remember, the true magic lies within the personalization and effort you put into creating your wand. So, grab your tools, let your imagination soar, and may your wand-making journey be filled with wizarding wonder!